Members and roles
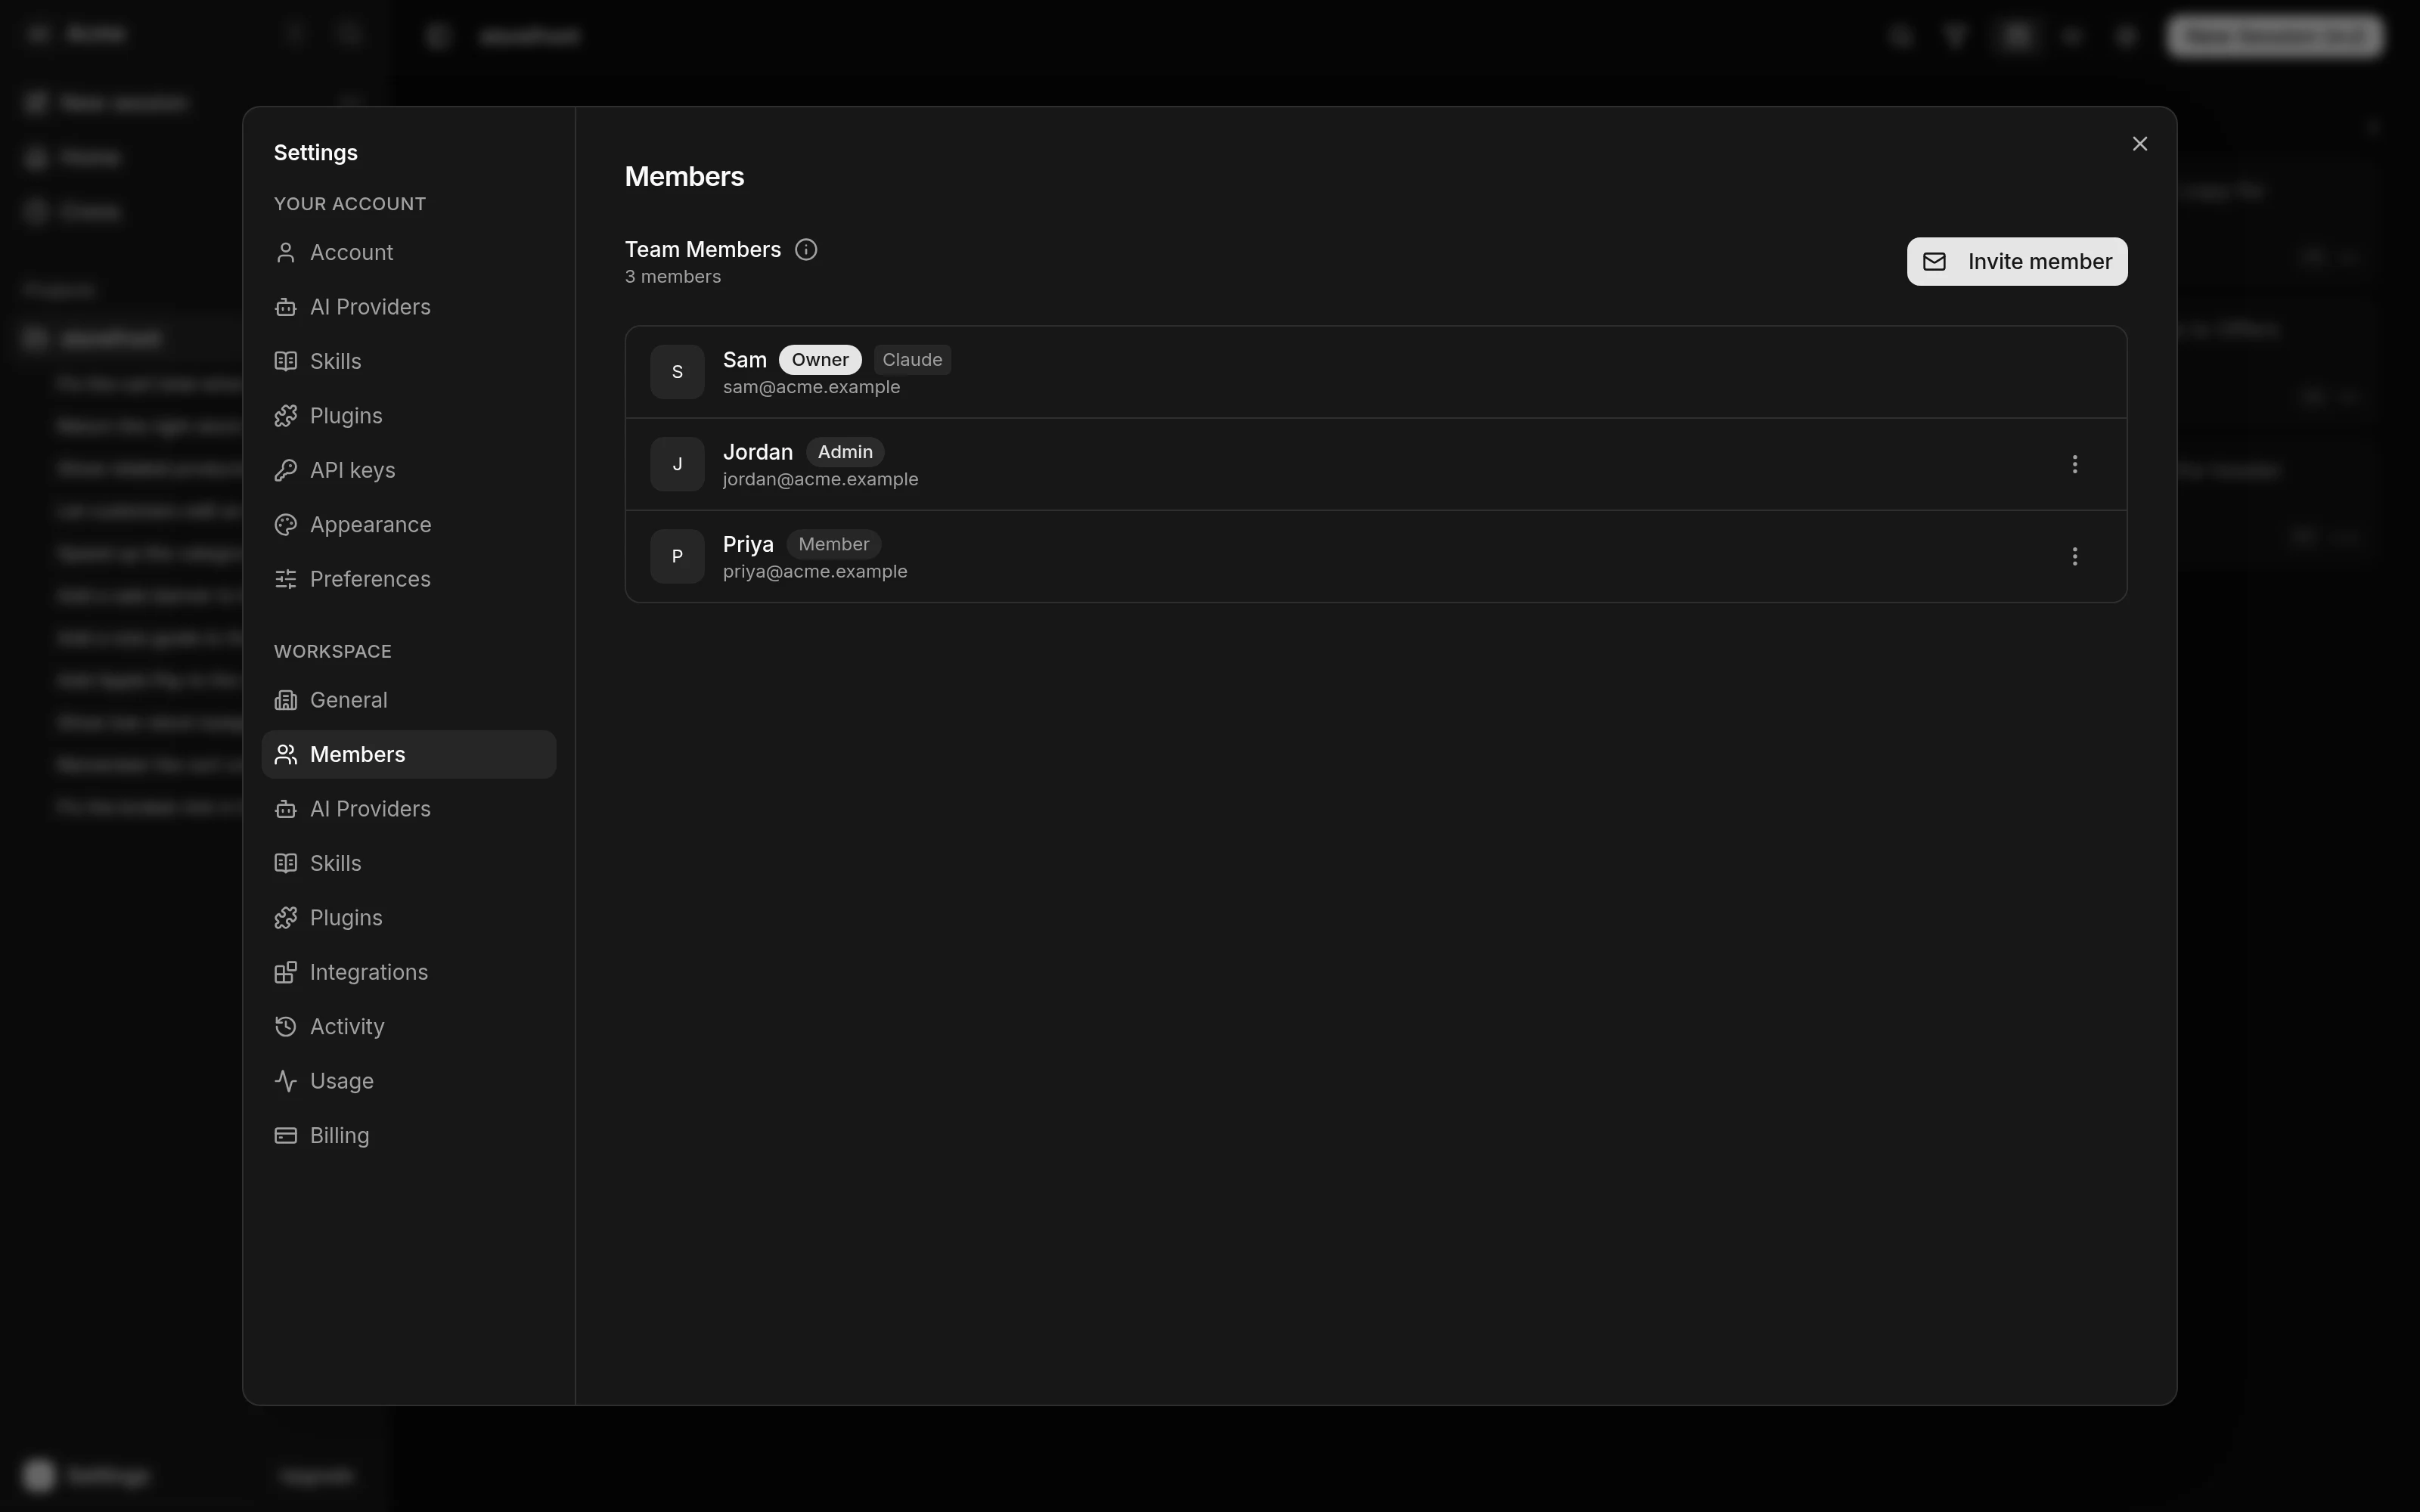
Invite your team to a workspace and give each person a role. The roles are Owner, Admin and Member. Owners and admins invite, change roles and remove members in Settings > Workspace > Members. Every member can work in every chat session, whatever their role.
To open Settings, press Settings at the bottom of the sidebar, then Settings in its menu. You can also press ⌘, (Ctrl+, on Windows and Linux).
Roles
A workspace has one owner, the person who created it, until they transfer it.
| What you can do | Owner | Admin | Member |
|---|---|---|---|
| Import projects, deploy them and change project settings | Yes | Yes | Yes |
| Open, send into, move, reassign and delete any chat session | Yes | Yes | Yes |
| Create Crons, and read Activity, Usage and the plans | Yes | Yes | Yes |
| Change or delete a Cron | Any | Any | Their own |
| Delete a message in Up next | Any | Any | Their own |
| Invite members, change roles and remove members | Yes | Yes | No |
| Set up workspace AI providers, Skills, Plugins and Integrations | Yes | Yes | No |
| Change the plan, overage and payment method, and see invoices | Yes | Yes | No |
| Rename the workspace, change its logo and set its timezone | Yes | Yes | No |
| Delete a project | Yes | Yes | No |
| Transfer ownership and delete the workspace | Yes | No | No |
| Leave the workspace | After a transfer | Yes | Yes |
Invite a member
- Open Settings > Workspace > Members.
- Press Invite member.
- Type the Email Address and pick the Role, Member or Admin.
- Press Send Invitation.
Kosuke emails a link that works for 48 hours. Until someone accepts it, the address waits under Pending Invitations. To withdraw an invitation, press the X at the end of its row. When one expires, send a new one.
Accept an invitation
Open the link in the email. The page reads Join and the workspace name, and names your role.
- If you are signed in with the invited address, press Accept invitation.
- If you are signed out, press Email me a sign-in code and type the 6-digit code from the email.
- If you are signed in with another address, press Sign in as the invited address.
When you are already signed in, the invitation also shows in the workspace switcher at the top of the sidebar. Press Join beside it.
Change a role or remove a member
Open the actions menu at the end of a member's row.
- Make Admin or Make Member changes their role.
- Remove takes them out of the workspace at once. There is no confirmation step.
You cannot change your own role or remove yourself. The owner's row has no actions menu for admins: the owner's role changes only through a transfer, and the owner cannot be removed.
Transfer ownership
Only the owner can transfer ownership.
- Open the new owner's actions menu and choose Transfer Ownership.
- Press Transfer.
The other member becomes the owner and you become a Member. Only the new owner can transfer it back.
Leave a workspace
- Open Settings > Workspace > General.
- Under Danger Zone, press Leave workspace, then confirm.
You lose access to the workspace and all its projects. Admins and members see this button. The owner transfers ownership first.
Delete a workspace
Only the owner can delete a workspace.
- Open Settings > Workspace > General.
- Under Danger Zone, press Delete workspace.
- Type the workspace name and press Delete workspace.
This deletes every project in the workspace, with its chat sessions and sandboxes, deletes every card its members published from Home, and cancels a paid plan. Every other member loses access. It cannot be undone.
Kosuke refuses while the workspace has an unpaid invoice. Settle it with Manage billing in Settings > Workspace > Billing. It also refuses while recent usage is still being billed, which takes up to 15 minutes. Try again after that.
Name, logo, timezone and Workspace ID
Settings > Workspace > General shows the Workspace Name, the Timezone, the Workspace ID and the logo. The name and the ID each have a copy button. The CLI and the API ask for the Workspace ID wherever they need a workspace.
To rename the workspace, owners and admins edit the Workspace Name and press Save. A name is 1 to 100 characters. The Workspace ID stays the same, so the CLI, the API and your API keys keep working. Members see the name read-only.
To set a logo, owners and admins press Upload image and pick a square JPG or PNG up to 2 MB. Remove clears it.
The Timezone is the Workspace Timezone: every cron in the workspace runs in it, and every cron time is shown in it. A workspace starts on UTC. Owners and admins pick another zone and it saves at once. Kosuke refuses a zone that would make a cron fire more often than every 15 minutes, or never, and names those crons. Members see the zone read-only. See Crons.
Create or switch workspaces
Open the workspace switcher at the top of the sidebar and pick a workspace to switch to it.
To create one, choose Create workspace in the switcher. Type a Workspace Name and press Create Workspace. You become its owner. Free credits are granted once per person, so a second workspace starts without them. See Plans and billing.
Work in any chat session
Every member can open any session, send into it, use its Preview, move it on the board and reassign it, whatever their role.
The Assignee is the person the work is booked to. Their Subscription, Personal Skills and Personal Plugins run the session, whoever sends the message. AI providers explains whose credentials run what.
In Up next, only a message's author can edit, move or steer it. Owners and admins can also delete it.
When a member leaves
When a member leaves or is removed, this happens in that workspace:
- Sessions assigned to them lose their Assignee. Completed sessions keep it.
- The next member who sends into an unassigned session becomes its Assignee.
- Their Subscription, Personal Skills and Personal Plugins stop reaching the workspace's sessions.
- Their Lead Chat is deleted.
- The cards they published from Home are deleted, and their links stop working.
- Crons they created keep running, on the workspace's Credentials.
- Owners and admins can delete the messages they left in Up next.
Limits
- A workspace name is 1 to 100 characters, and only owners and admins can change it.
- Members, roles and ownership change only in the web app. An API key cannot change them. See What only the web app can do.
Next steps
- Connect an AI provider for the workspace.
- Choose a plan and see what usage costs.