Project settings
Project settings hold what Kosuke needs to run your repository. They cover the sandbox size, the services, the environment variables, the branches and the setup scripts. The deploy agent fills them in on the first deploy. To change them, open the project and press Settings (the gear) in the project header. You can also pick Settings from the project's menu in the sidebar. A phone shows no gear in the header, so use the sidebar menu there.
The settings view shows the Deploy Chat on the left and the settings panel on the right. The panel's tabs are Sandbox, Services, Environment, Advanced, Logs and GitHub. Every member who can open the project can change them.
Before the first deploy, the panel is locked, because the deploy agent writes it. Press Edit manually to unlock it.
When a change takes effect
Most sections save when you press their Save button. A sandbox tier saves as soon as you pick it.
After a change, press Redeploy at the bottom of the panel. The live Preview uses the saved settings only after a redeploy. New sessions usually start with the saved settings at once. A session can instead pick up a sandbox Kosuke prepared before the change. That session keeps the old tier and the services already running, even after a redeploy. A redeploy also replaces the sandboxes Kosuke keeps ready for new sessions. It does that last, after the live Preview is up. Once the live Preview is up, a new session never takes an old one. Until the Deploy Chat's Warming N more sandboxes line finishes, a new session boots a fresh sandbox, which starts slower. If it shows Warming N more sandboxes failed, new sessions keep booting fresh sandboxes until Kosuke refills the spares. Sessions already running keep their old settings too. Deploy your project explains what a redeploy does.
Sandbox
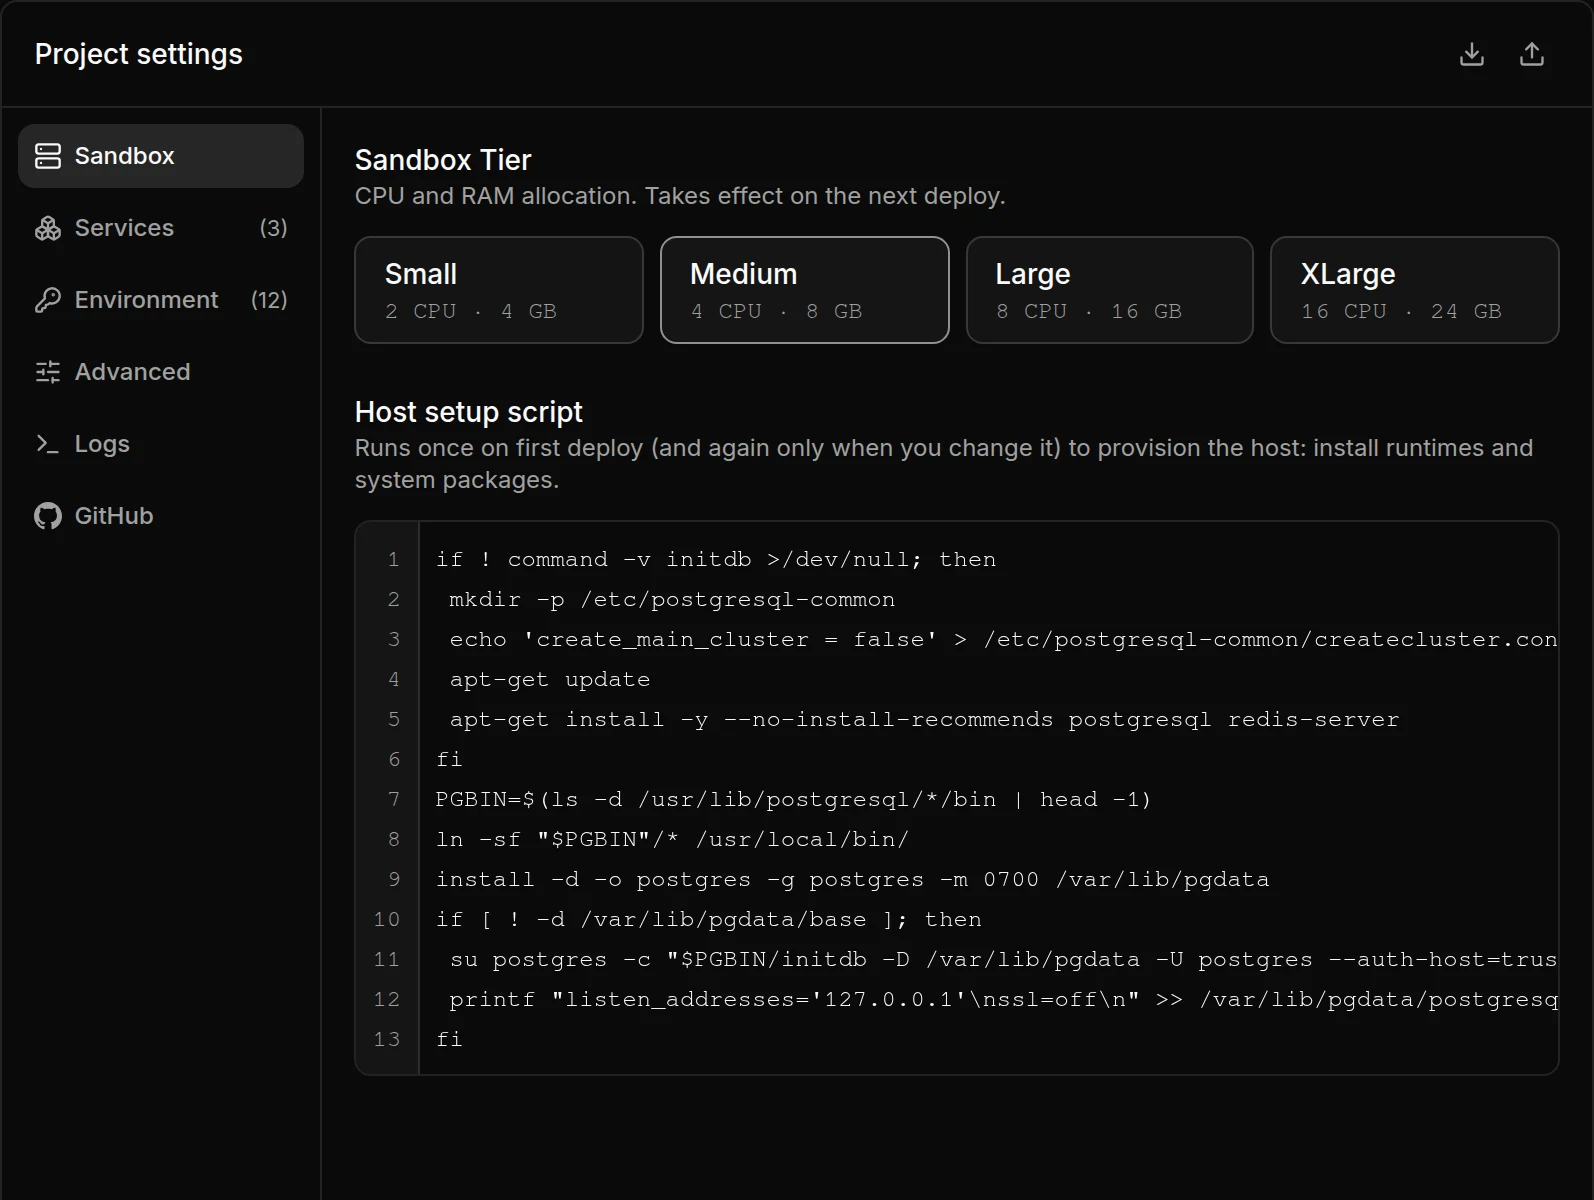
Sandbox Tier sets the CPU and memory of the live Preview and of every chat session's sandbox. A new tier reaches the live Preview on the next deploy. New sessions usually get it at once, as When a change takes effect explains.
| Tier | CPU | Memory |
|---|---|---|
| Small | 2 | 4 GB |
| Medium | 4 | 8 GB |
| Large | 8 | 16 GB |
| XLarge | 16 | 24 GB |
The first deploy boots XLarge, and the agent then sets the tier the project needs. A larger tier costs more per hour. Plans and billing lists the rates.
The Host setup script installs runtimes and system packages, such as a database server. It runs on the first deploy, and again only after you change it.
Services
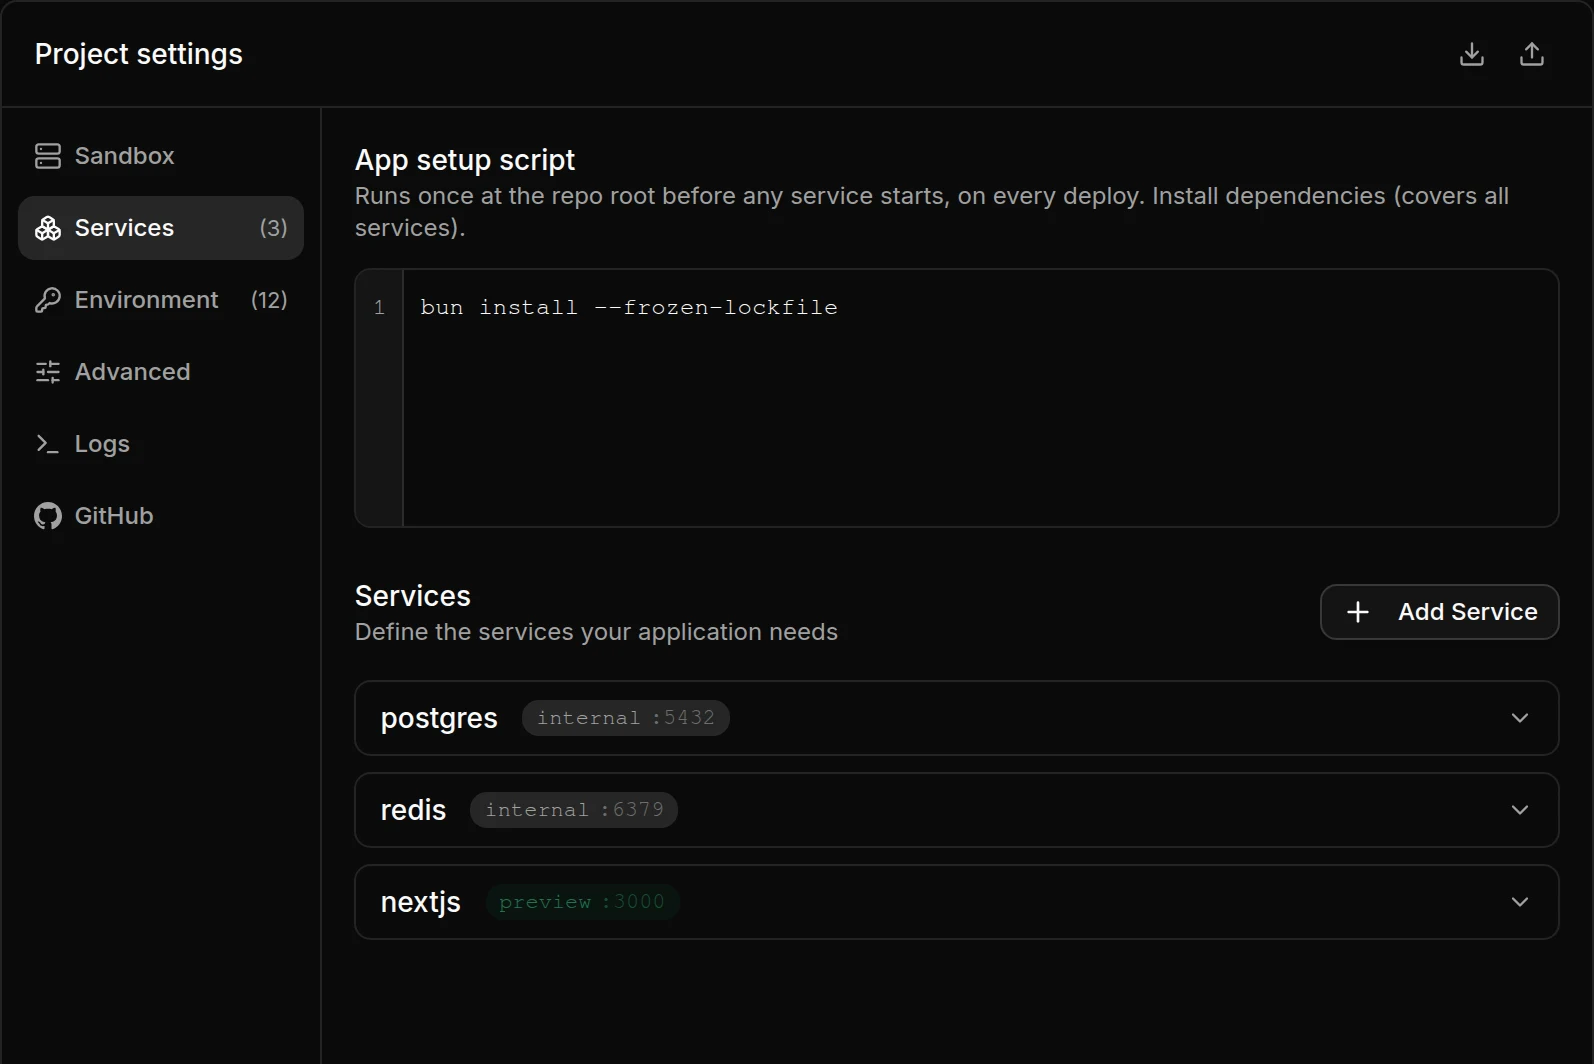
A service is anything that runs, such as an app, a worker or a database. Press Add Service to add one, or press a service's row to open it.
The App setup script at the top of the tab runs once at the repository root before any service starts, on every deploy. Put dependency installs there, such as bun install.
| Field | What it holds |
|---|---|
| Name | Required. Lowercase letters, digits and inner hyphens. |
| Directory | The folder the service runs from. Empty means the repository root. |
| Start command | Required. The command that starts the service. It must listen on its first endpoint's port. |
| Stop command | Optional. The command that stops it. |
| Docker stack | Tick it for a multi-container stack run with Docker Compose. The start and stop commands become its up and down commands. |
| Env files | Docker stacks only. The paths the environment variables are written to. Defaults to one .env. |
| Endpoints | The ports the service listens on. A service with none runs in the background. |
| Depends on | Services that must be ready before this one starts. |
Each endpoint has a Name, a Port, an Exposure and a Health route.
| Exposure | Where it is reachable |
|---|---|
| Internal | Only inside the sandbox. It gets no URL. |
| Public | At its own URL in a browser. It stays out of the Preview tab. |
| Preview | At its own URL, and it shows in the Preview tab. |
List a service's main endpoint first. Kosuke checks it to decide the service is ready, and {{name.url}} points to it. The Health route is an HTTP path such as /api/health that Kosuke requests for that check. Leave it empty for a database such as Postgres or Redis.
Press Save on the service, or Add Service for a new one. Delete removes it.
Environment
Environment variables reach every service when it starts.
- Press Add Variable and fill in Name and Value. To add many at once, press Import .env, drag a
.envfile onto the tab, or paste severalKEY=valuelines into a field. - For a password or key, press the lock icon to mark it secret. A secret value stays hidden until someone presses the eye icon beside it.
- Press Save Variables.
A value can point at a service instead of a fixed address. Type {{ in a value field to pick one.
| Placeholder | Becomes |
|---|---|
{{name.url}} | The public URL of the service's first endpoint. Only for Public and Preview endpoints. |
{{name.url_int}} | The address inside the sandbox, such as http://localhost:3000. |
{{name.endpoint.url}}, {{name.endpoint.url_int}} | The same for an endpoint other than the first. |
For example, with a nextjs service on port 3000 and an api service on port 4000:
NEXT_PUBLIC_APP_URL={{nextjs.url}}
API_URL={{api.url_int}}
DATABASE_URL=postgresql://postgres@localhost:5432/app
Kosuke fills in each placeholder when a sandbox starts. Every sandbox has its own public URL, so each session gets the right one. Placeholders always give a web address, https:// for url and http://localhost for url_int, so write database connection strings out in full.
Advanced
| Setting | What it does | When empty |
|---|---|---|
| Agent Working Directory | The folder, relative to the repository root, where the agent works. Use it when the app lives in a subfolder. | The repository root |
| Branch sessions from | The branch new sessions start from. The live Preview follows it too. | The repository's default branch |
| Open PRs against | The Target Branch. Pull requests open against it, and Sync brings it in. | The repository's default branch |
| Warmup Script | Runs after the services are healthy. Use it to request the busiest pages so the Preview loads fast. | Nothing runs |
| QA Guide | How to test the project in a sandbox: which service to open, how to sign in, how to find and create its data, and the traps to avoid. /kosuke:automated-qa writes it the first time it tests the project and reads it on every run. You can edit it here. A change reaches the chat sessions created after it, with no redeploy. Sessions already running read the current guide at the start of each QA run. The deploy agent never changes it. | QA works it out on its first run, then saves it |
The two branch settings sit under Branch Overrides and share one Save button. The QA Guide has its own Save button and holds up to 102,400 characters.
Logs
The Logs tab streams the live Preview's logs. Pick Full logs, Setup, or one service. While a deploy runs, it shows the deploy's sandbox instead. Open it first when a deploy fails.
GitHub
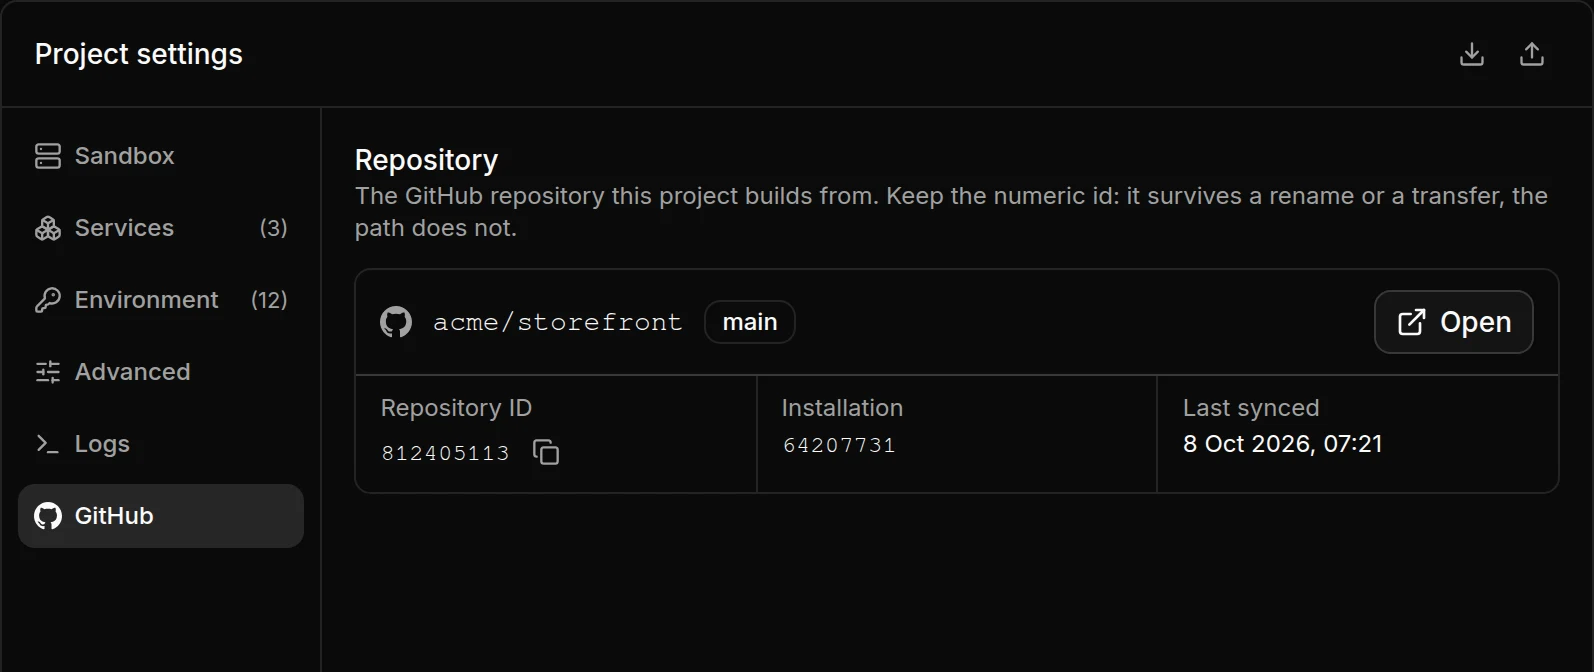
The GitHub tab shows the repository the project builds from. It has the repository's path, its default branch, and an Open button that opens it on GitHub. Below it are the Repository ID, the Installation and Last synced. Last synced is the time of the last push to the branch sessions start from.
The Repository ID stays the same when the repository is renamed or transferred on GitHub.
Export and import the settings
The two icons at the top right of the panel move the whole configuration as one file in the kosuke.config.json format.
- Export config downloads it as
<project name>.config.json. The file includes the QA Guide asqaGuide. - Import config reads such a file into this project. Kosuke checks it first and lists any problems in an Errors tab. A valid file opens the Import Configuration dialog, which warns that it replaces all existing settings. Press Continue, then Redeploy.
The exported file holds every environment variable's value, secrets included. Keep it out of your repository.
Rename or delete a project
In the sidebar, press the project's menu (...) or right-click the project.
- To rename it, choose Rename, type the new name and press Save. Any member can rename a project. The GitHub repository keeps its name.
- To delete it, choose Delete Project and confirm with Delete Project. Only owners and admins see this option. Deleting removes the project and all its data from Kosuke for good. Your GitHub repository stays as it is.
Limits
- On a phone, the settings view shows the Deploy Chat or the settings panel, one at a time. Switch between them with Chat and Settings at the bottom, and pick a section from the list at the top of the panel.
- An import replaces every existing setting, except the sandbox tier and the QA Guide when the file leaves them out.
- A placeholder that matches no service endpoint stops the sandbox from starting.